As you know, it took me a long time to get the facilities that really made a difference in my breeding program. I didn’t have everything how I wanted it when I first started out.
An overview of my kennel
The facility I have now has made a great improvement, but it isn’t my most ideal facility. In this Case Study I’m going to review my current facility, what I love and what I hate, with some ideas for what I would change.
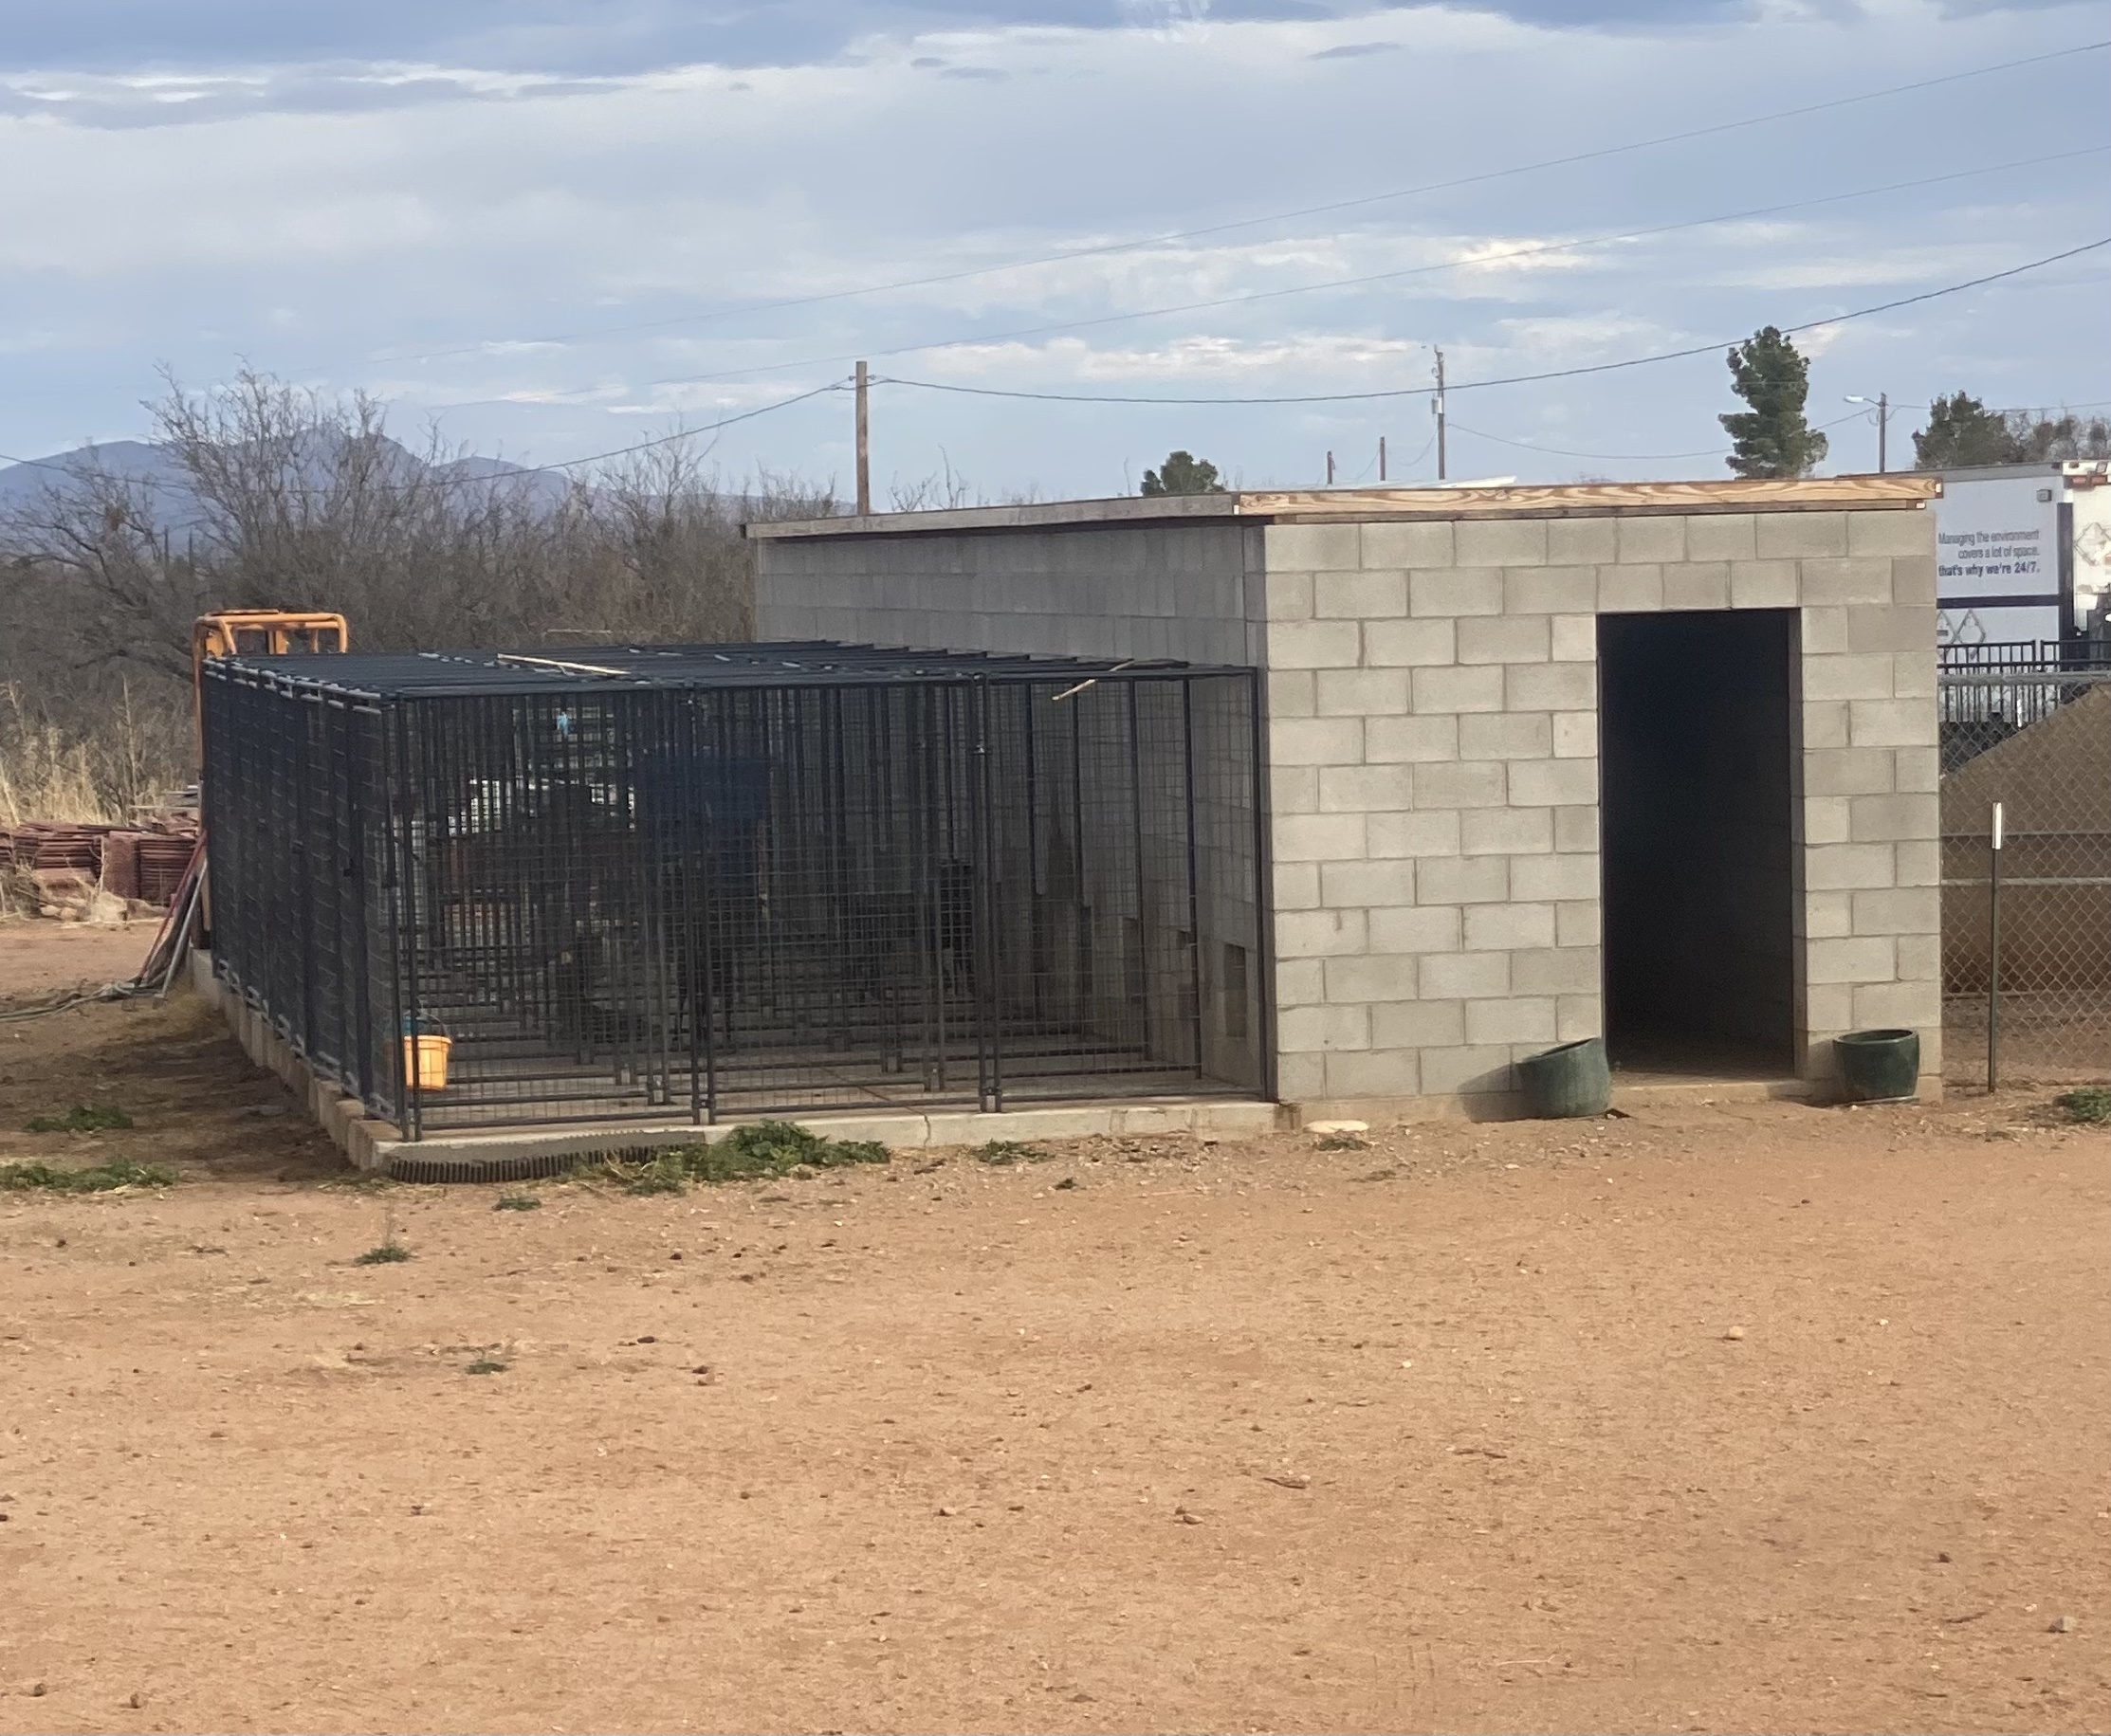
First off, let me give you the general idea behind it. My facility is on a concrete slab, it is 22’ wide, 50’ long, approximately 7 x 16 meters. In my original plan, this facility was going to be half of the final facility, there was a whole other side I was going to add on, but I’ve yet to do it, and probably won’t.
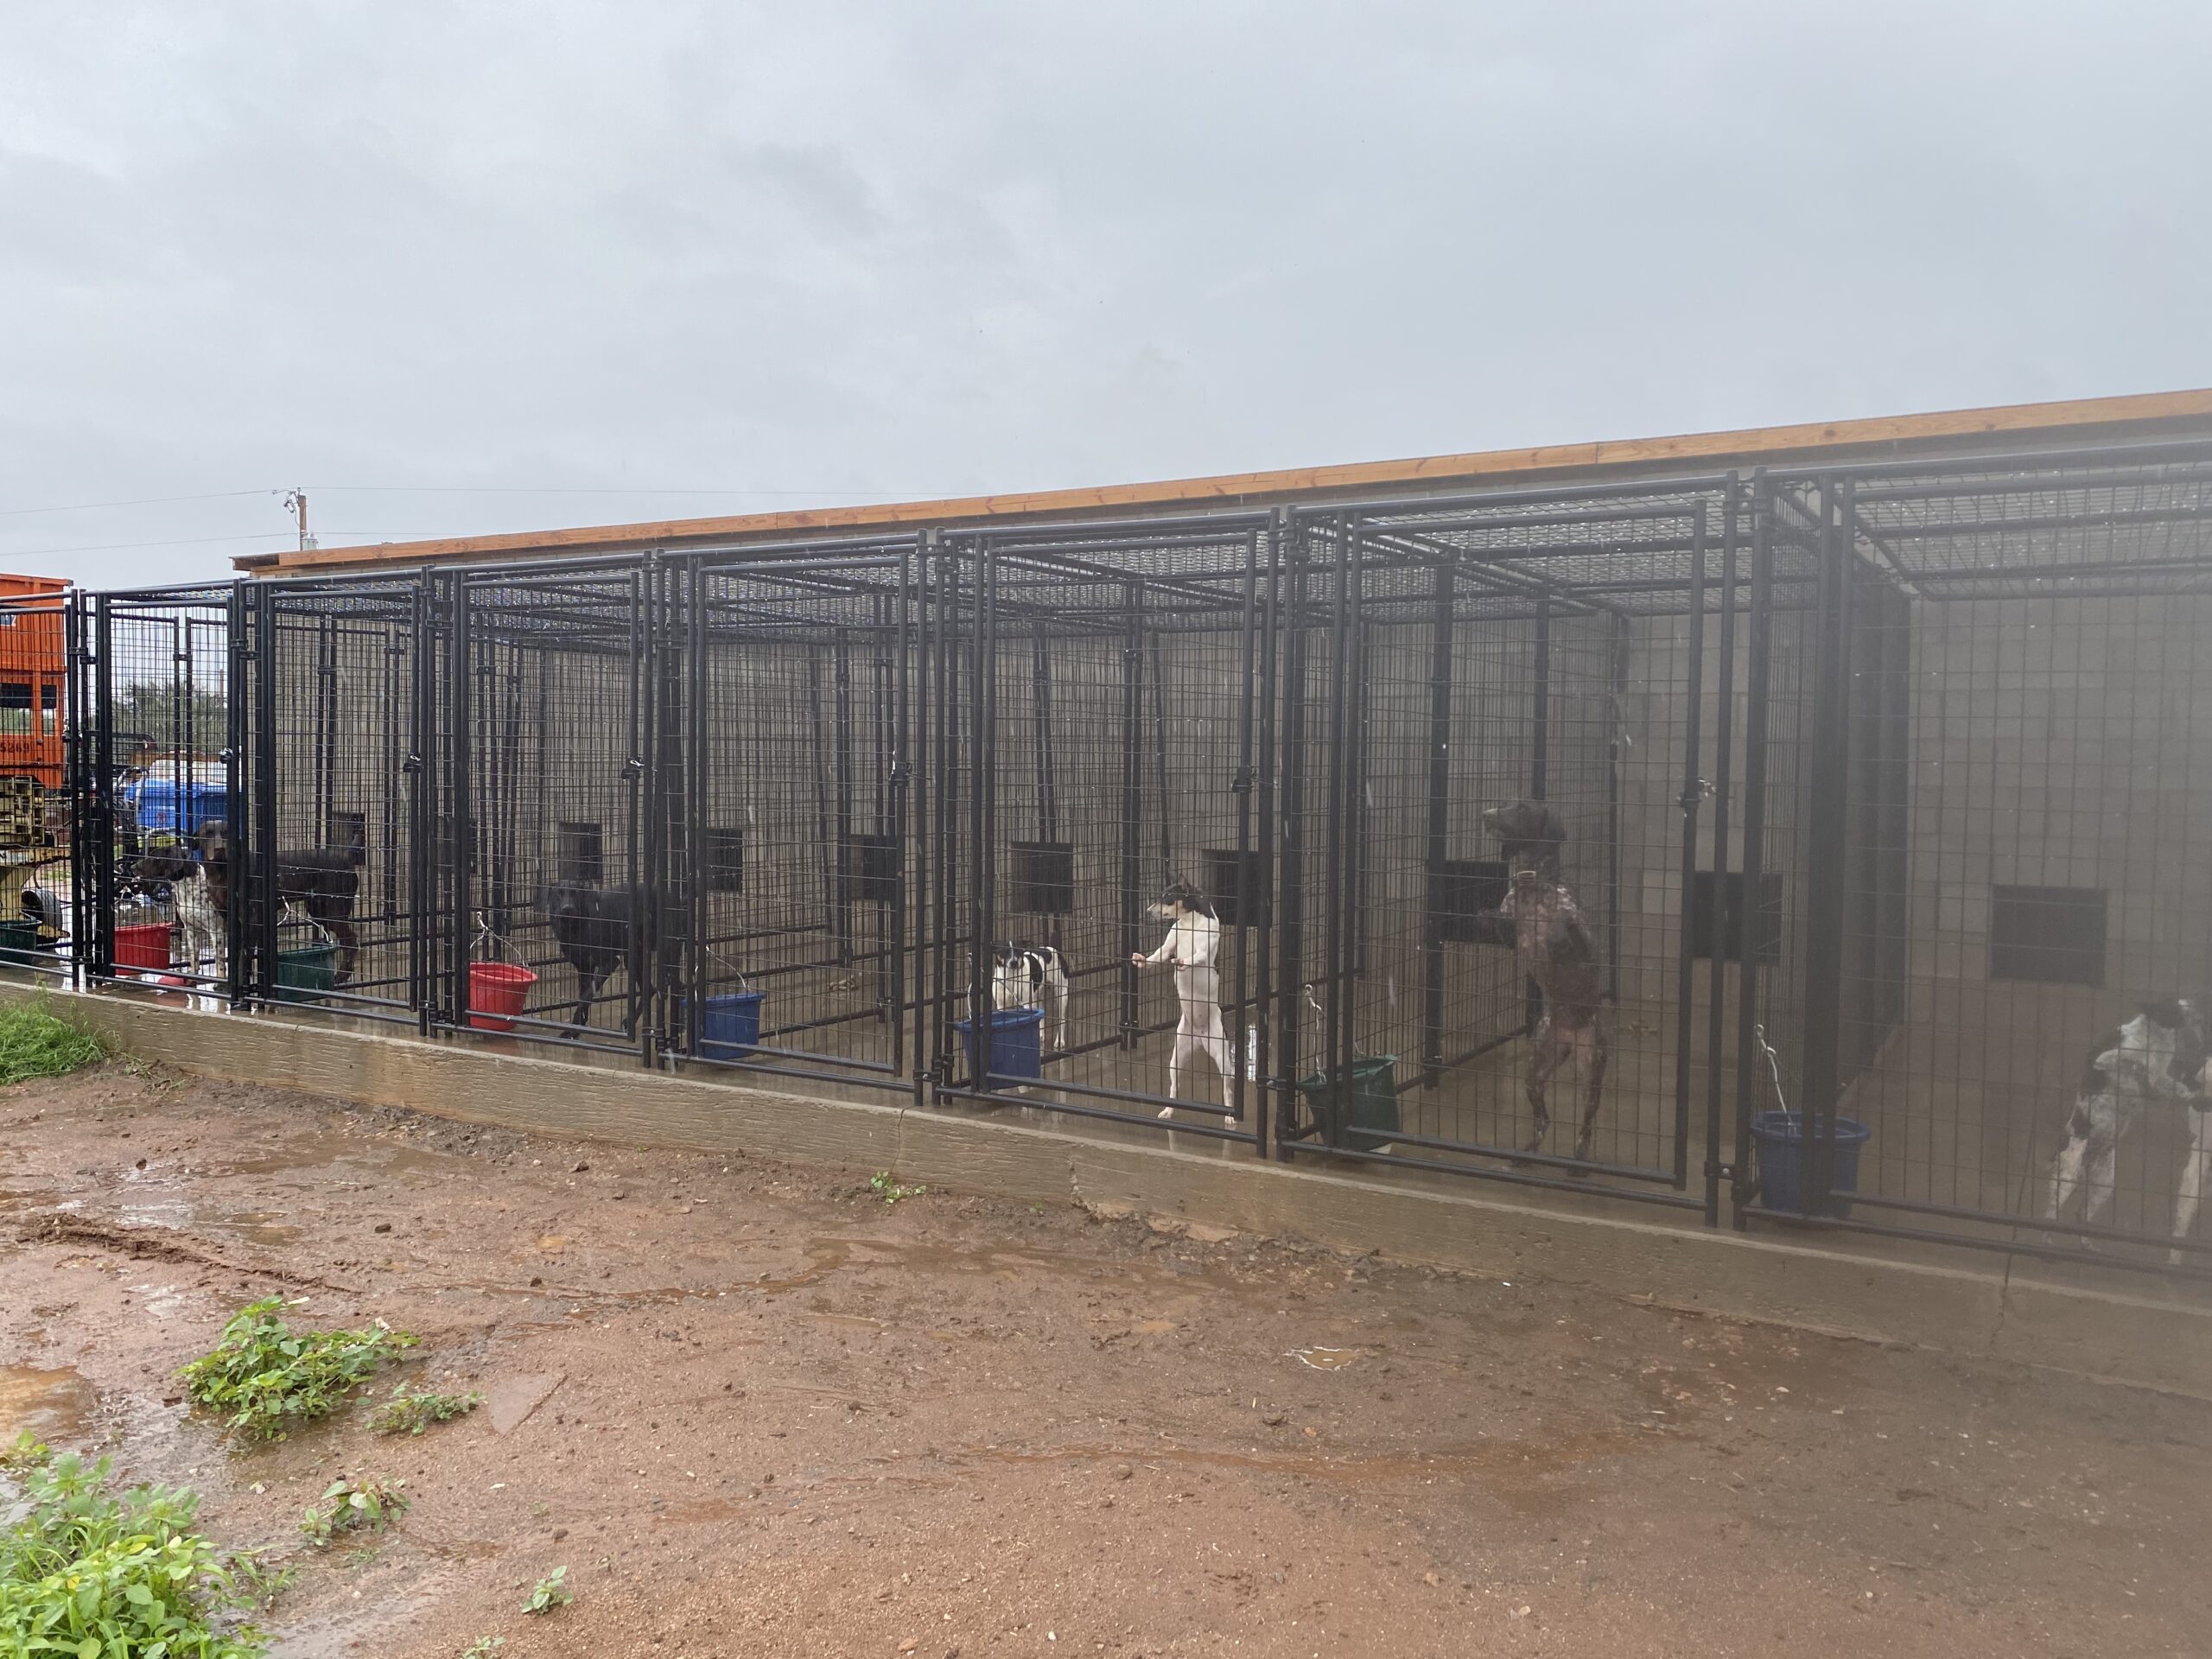
The facility was designed around having 12 dog lanes that are 12’ long by 4’ wide, with an additional 4’x4’ section on the inside. I found this to be the easiest design dimensions with the standard dimensions of modular welded-wire panels and the size of my dogs. Mind you, I was in debate of only using two 4’ panels on the exterior, making the exterior lane 8’ long instead of 12’ long and I’m EXTREMELY glad I spent the extra money to get the 12’. The dogs have much more room to move around and it allows me to put two adult dogs in a pen and that’s a lot less stressful. If the length had only been 8’ I wouldn’t have been able to manage as many dogs as I have, especially when boarded dogs come.
I do board a lot of dogs. Generally they are mine, as in dogs I’ve bred, but not always, I’ve met a few families over the years in the local area and they like that my boarding price is cheaper and they don’t need to schedule far out with me. With my facilities I can always move things around, so I can always accommodate one more dog, like when my friend needed to board her 3 German Shepherds while moving homes, it was a busy week at the kennels, but we made it work, and everyone was okay.
On a side note, designing your kennels to accommodate boarded dogs, or well, extra dogs, never hurts, I’ve found numerous occasions where having the extra room was really helpful. There’s also a lot to say for the ability to make some extra boarding dog cash. I remember the first summer I had my facilities I was able to board a bunch of dogs, people were on vacation and I was in between litters, it carried me through while my finances were in a lull.
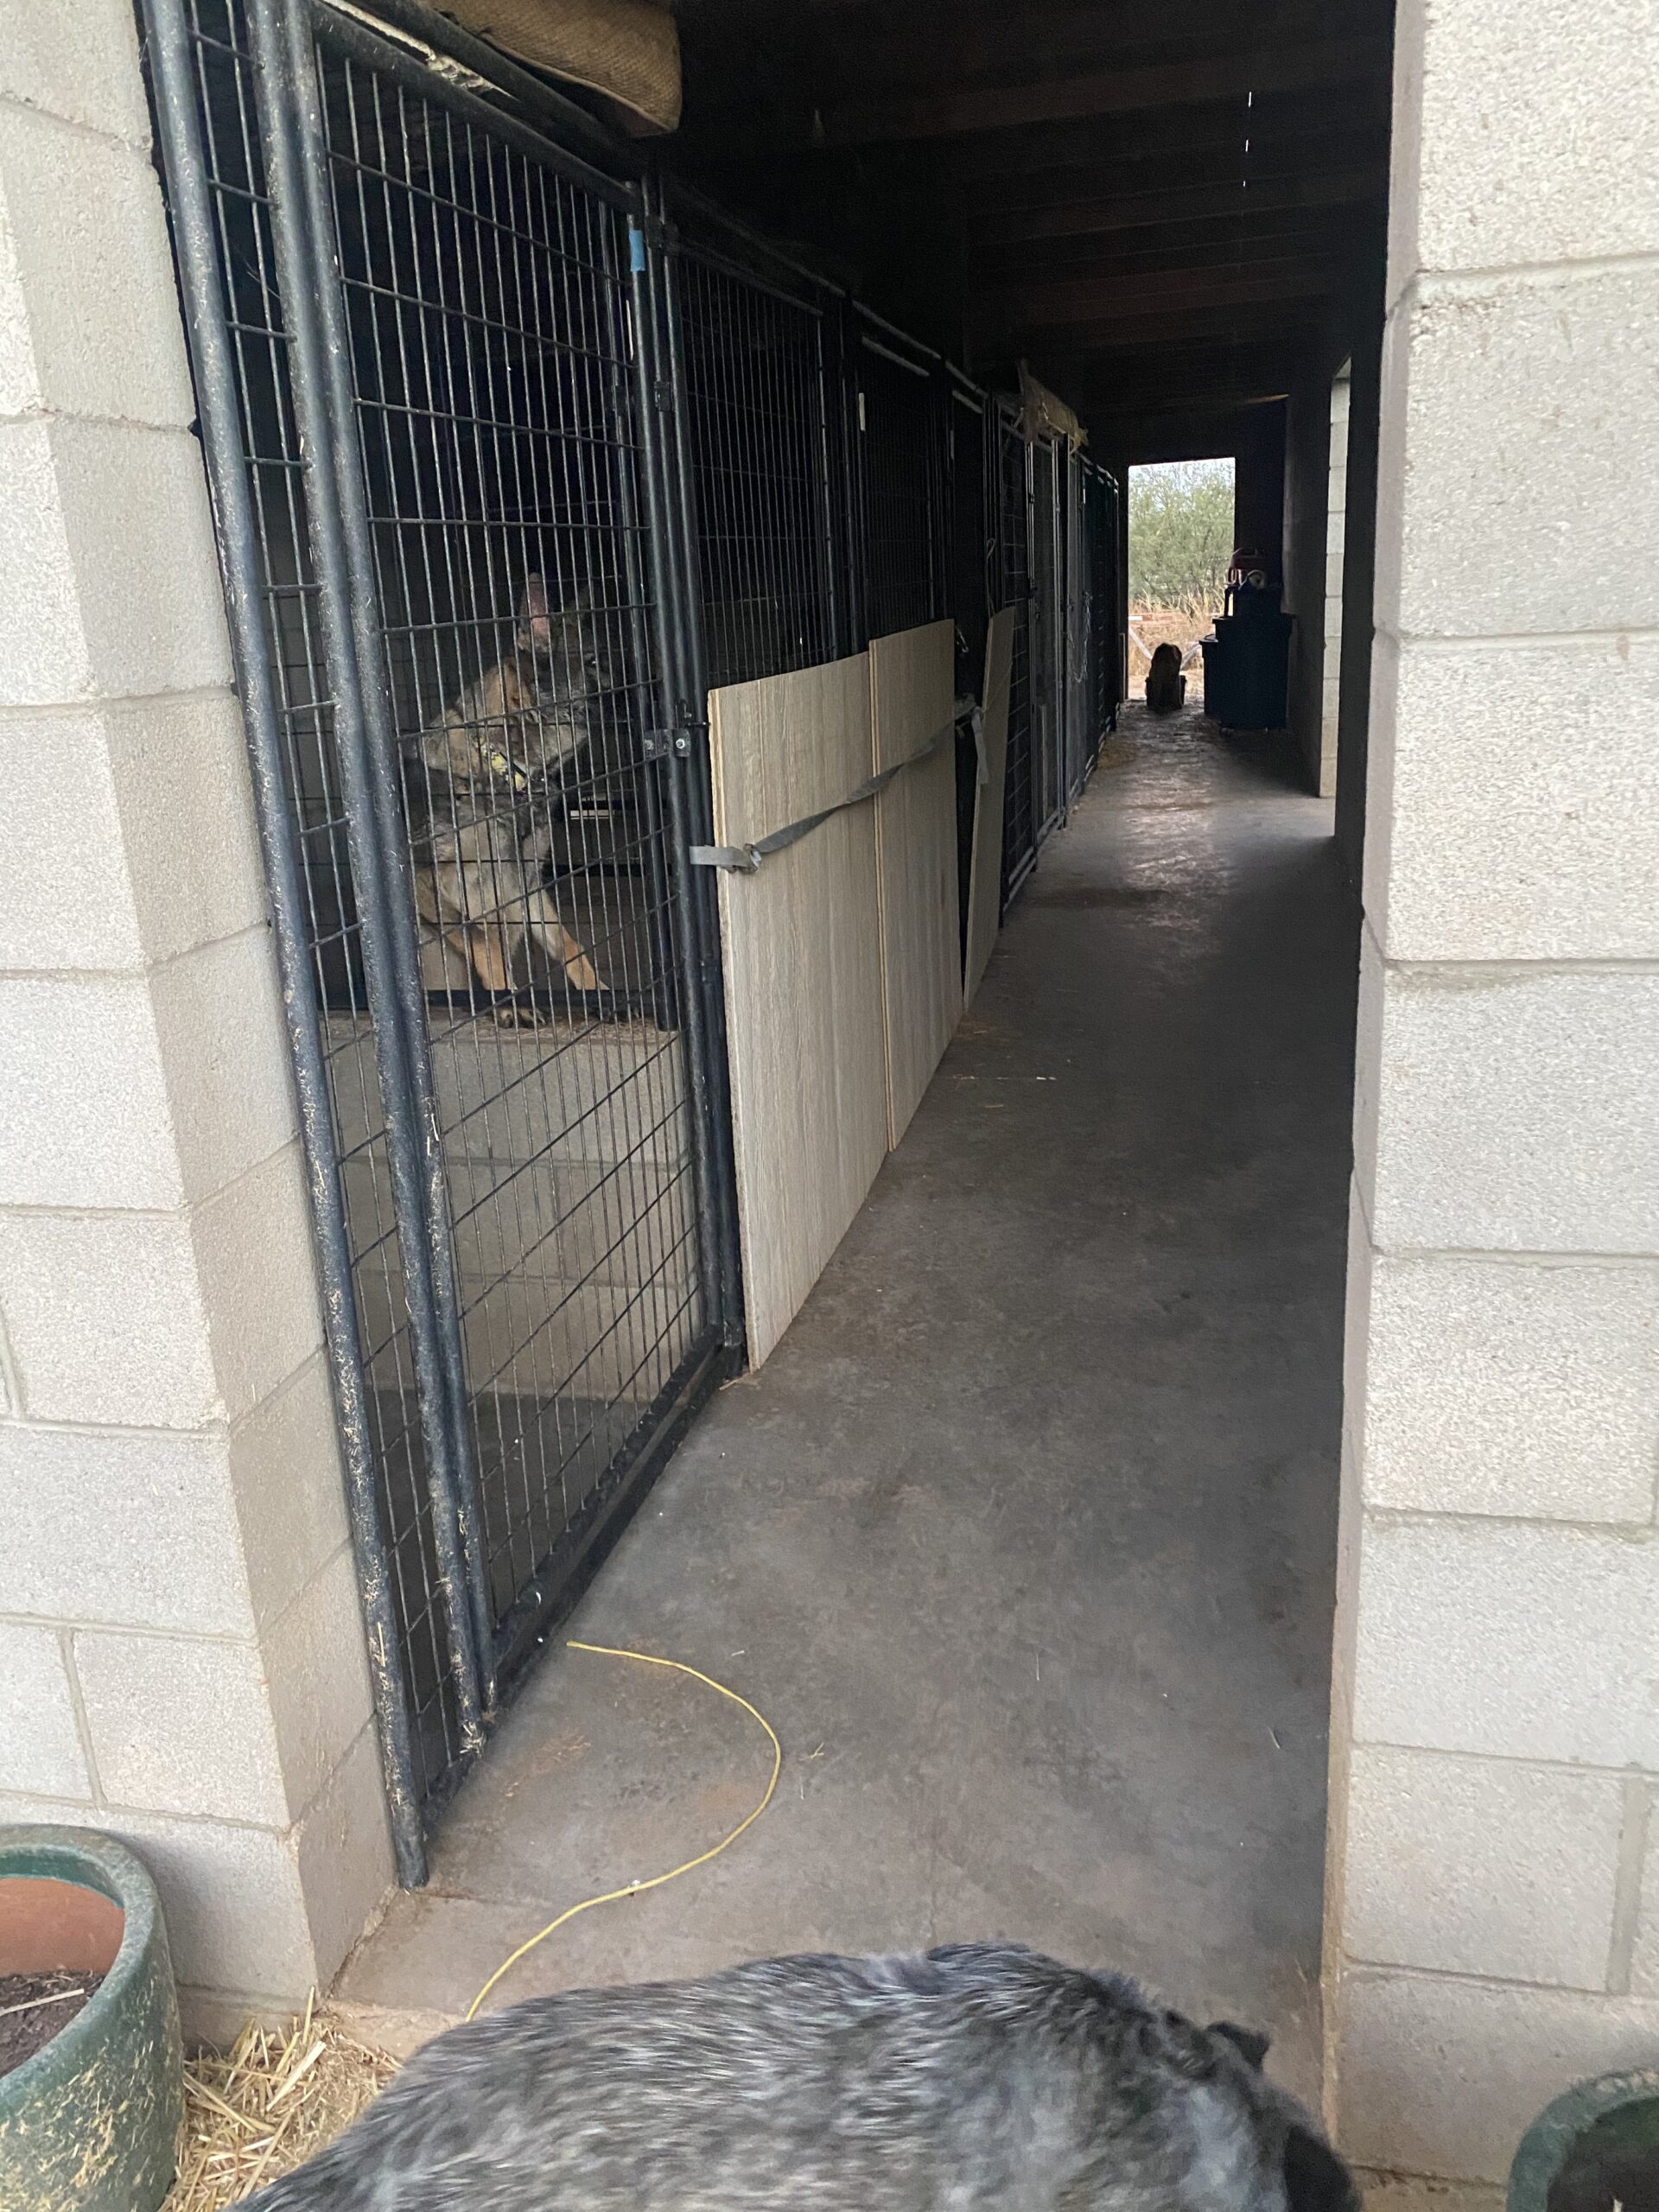
The interior section of my kennels is only 8 foot of space wide. 4’ of that is the interior 4’x4’ space for each kennel lane and the other 4’ is the walk way. I really like this width, my kids and I pass each other in the space with the big trash bin on wheels that I use to store dog food and we have lots of room to maneuver, I wouldn’t go any less than 4’ wide for a walkway.
The materials used
I made some really great decisions in designing this kennel, I really like the spacing, I also loved Bill’s advice to use cinderblock, or concrete blocks, for the walls. These blocks are the standard ones, that are 8” wide, 8” tall, and 16” long. I’ve got them pictured below. They are very stout, they absorb sunlight and heat in the winter and so the interior of the kennels stays a nicer temperature without heating or cooling.
On the interior kennel sections, the 4’x4’ ones, I separated each lane with a 2’-tall cinderblock wall and a 4’ panel sitting on top of it. This gives the interior a little more break for the dogs, they can get a little space away from each other. As it was designed to house 3 studs, I didn’t want the studs to fence fight if they were on the inside, in fact, I didn’t want them to see each other, so on the interior, I have a full 8’ tall cinderblock wall every 4 lanes, effectively dividing my kennel into 3 sections of 4 kennel lanes. If I were to do it over, I would’ve made the entire interior with cinder block that’s 8’ tall, or at least 6’ tall in each lane. I have had a lot of dogs boarded who get stressed out easily and need a full break from other dogs. This would’ve allowed that to work better, since when they were inside the building, they would have peace and quiet and not have any dogs antagonizing them.
The exterior, however, is all panels, so it’s just rows of panels. I like that you can see through the panels on the outside. I positioned my kennels such that I can see all the exterior lanes from my kitchen window, which I’m frequently at, allowing me to see the dogs when they are in the kennel lanes.
What I don’t like about the exterior is that when you pressure wash it, whatever is on the kennel lanes can reach to all kennel lanes, this is less-than-ideal for disease transfer.
I’m in debate as to the best way to handle this, I’ve thought about it a lot. If I build the exterior lanes complete floor to ceiling, where the dogs couldn’t see each other, it would be difficult to quickly glance at them and see them. It certainly wouldn’t work from my kitchen window. However, it would prevent the transfer of any nasties from pen to pen. If I did a half wall, I still wouldn’t see them, as my dogs are pretty short. If you build any sort of walls, it would be ideal to have cameras on each lane so you could see them all. However, I also wonder if the dogs would be lonely. There wouldn’t be any fence fighting or excessive barking from them staring each other down, which happens from time to time, but I feel like the dogs would be lonely being completely isolated from one another, which, with bird dogs, is a bit of a thing, they like being with other dogs. The ratties, too, really. It would also be EXTREMELY loud, nothing echos like a dog barking in a kennel lane made of concrete and cinderblock, our local shelter is built like this and it’s misery, you can’t hear anything there, so loud.
I think what would be ideal is a curb, a curb that is about 4” tall, something that would prevent most of the transfer of disease or feces from pressure washing, but that would be something I could easily see over when looking out at the dogs. I really find it so easy to check on them from my window, I can see each dog in the morning as they come out and if anyone is injured, acting weird, or anything, I can usually tell from their silhouette and how they walk. It’s nice to be able to see that without going out there and specifically looking at each individual dog.
If I did a curb it would be ideal to have it formed in concrete with a single pour, as that would allow the corner, where the curb and slab meet to have a curved trowel made is a rounded corner, easier to keep clean, but it could be done after the fact with block, they have tiny block that’s 4” tall. It could be filled and capped, making it suffice, then putting a kennel panel on top of the curb.
Inside the Dog Breeder Society, I’ve illustrated a picture of the curb in a cross-section so you can see what I mean, and in comparison with full length and also the 2’ wall I used.
One thing that’s been really helpful is that I was careful to keep in mind the dimensions that products come in and I’ve used them to make everything happen. For example, everything was build around the 4’ wide kennel panels, each lane, the length of the lanes, and then I got the over all dimensions after building the interior pieces. A lot of people start this process the other way around, they start with the exterior dimensions, then try to fit everything inside. I think for stuff like kennels—which are so dimensional—it helps to build the interior and then put walls around it, letting the overall size design itself.
Additional Considerations
Another thing that has been extremely helpful is the doggie doors in between the interior and exterior. The wall between the interior and exterior parts of the kennel lanes are made with cinderblock as well. The doggie door itself is a square that’s the size of two cinderblocks, so the hole is 16” by 16”. The door is also off the ground the height of a cinderblock, so the door is 8” off the ground. You can see this in the pictures below.
I originally put the door 8” up because I wanted a spacing for the puppies, figuring I didn’t want puppies leaving the interior area before they were big enough to scale that 8” wall. For my pups that was around 4-5 weeks of age. It worked out really well, because they learned to potty train themselves to go outside by about 6 weeks of age and I didn’t really need to do anything.
The additional benefit that I didn’t anticipate when I raised the doggie doors off the floor 8” was that it completely changed my ability to clean and use bedding. Let me explain.
In the winter, straw seems to be the best for my dogs, it’s cheap and easy, so I use it. It keeps them warm and creates a nice bed for them. I found that the 8” acted as a curb that kept the straw in nicely. Because my doors are welded wire and sit off the ground about 1.5” a lot of the straw would fall out, so I cut leftover 2’x6’ lumber tight to the width of the kennels and I sandwiched it between the two walls of the block on the inside, along the inside of the kennel doors. It worked really well and kept the straw in pretty well. The issue was cleaning, taking the wood out was not a fast and easy process, so it took a while to do, thus I didn’t get it fully cleaned out as often as I would like. Remember, the easier it is to do, the more likely you’ll do it more often and quicker.
I think an improvement here would be some curb that is easily installed and removed, maybe a channel that the board would slide in that was also safe for the dogs and easy to clean around.
It would also be possible to get a solid door that would hold it in, but that might be more expensive, and I would want it clear to see the dogs, meaning it would either need to be glass or plexiglass or similar, which I think the expense might make it more prohibitive than beneficial.
You could also build in a curb, similar to what I discussed between the kennel lanes, but then you have the question of how to clean that section. You want to be able to sweep out bedding, or really anything that’s in there. I like being able to sweep it to the center, it seems easier for cleaning. The local shelter used a small drainage grate. It was essentially an 8” x 8” square that was in the corner of the interior portion of the pens and it drained into a large drain pipe that was in the floor. The woman who worked there explained that it was nice to be able to drain it inside the pen, but that the stainless grate cover was not removable and so many times poop or hair would get stuck in it and would be a pain to clean. Definitely want a removable grate for draining if you can. Just consider the size of the grate and how it would affect dog feet, if they’ll be likely to get caught in it, stuck, or even cut by it.
This is why I think it’s probably still the easiest thing to have the trough outside of the interior lanes with a removable curb.
If you can’t find a good way to build a curb and still want to use bedding like straw or shavings, an option would be to get the larger rubber water buckets, they’re usually sold for horses, I’ve used these and they contain the straw pretty well and the dogs will sleep in them okay. I’ve got a few pictures of that below.
You can also opt to put rubber mats down in the kennels, this will create a buffer to the floor and then use some form of blankets or towels, I don’t find this as nice, it would be better to use a padded dog bed, but my dogs will destroy them, so I just don’t want to waste the money. I may try and use them with my older dogs, but I haven’t at this time.
Want to Get the Roadmap to a Successful Breeding Program?
Covering the exterior
I spent a long time, like a year or so, debating if I should cover my exterior lanes or if I should just cover the interior of the kennels.
It was difficult to span the length of the kennels, I would’ve needed posts and I couldn’t figure how to put the posts around my current slab. I had only ordered 25’ long metal sheeting and after reflection, I should’ve ordered longer panels, something to the tune of 30’ to cover the slope, the 22’ wide slab, and then a 4’ walk way between the posts and the kennel lanes. I’ll discuss that more in a second. Also, the posts aren’t usually at the edge of the roof, either, they often sit in a few feet, so this was another issue for structure in using the 25’ panels that I had.
As for whether to cover the exterior lanes or not, it’s up to you. The reasons I didn’t want to cover it was because I like the sanitation that the sun provides with UV light. Parvo can’t survive UV light for example. I also like how the dogs love to lay in the sun in the morning and get warm, especially in the winter. I also appreciate how the poop dries out faster, especially in our dry Arizona heat, and the sun made it a lot less homey for spiders. I do think spiders have way too many legs.
I’ve opted to cover it with tarps in the summer, I buy the heavy duty ones in the summer and cover the lanes, I attach them with zip ties, it’s not my favorite solution, but it has worked out as a less-permanent solution.
The reasons I wanted it covered was so the dogs could have shade in the summer when it’s hot and so they could stay out of the rain in the summer when we have monsoon season for a few months. Keeping it dry in the winter, would be nice, also, as we occasionally get rain. Rain on dog poop can make things pretty gross pretty quickly. One thing I didn’t do when I had my slab was fill in the expansion joints.
What I wish I had done differently
If you aren’t familiar, concrete expands and contracts a bit with the weather and temperature, it’ll also settle a bit on the ground after it’s been there a few months or years. You can mitigate some of this with how you pour the concrete, the prep work you put into the ground before hand, the rebar framing or the fiber in the concrete, but concrete wants to crack, so we tell it where to crack by making these cuts in it, they become the weakest point in the slab and so that’s where it cracks, keeping the general appearance clean.
You can fill these cracks to prevent water from seeping in them. I failed to do this with my slab and so that very wet winter we had, the water would run into the expansion joints and then it would freeze. When it froze, the water expanded and caused more severe cracking in my slab, making some of it uneven. I also didn’t have adequate drainage around my building so water seeped under the slab in certain areas and this caused some of my foundation to settle and caused more cracking. Overall, the cracking in my slab is not bad, I really can’t complain, there are a few mild toe-stubber areas, but it’s still very manageable, but in the effort of giving you the best information, I should’ve been a little better about a few things.
Another thing I wish I would’ve done, which would’ve helped with the drainage, was getting a sidewalk around my building, especially in front of the kennel lanes. Unfortunately, and a little bit embarrassingly, I first scrape the poop out of the kennels under the doors, I use a concrete scraper, get pictures and additional details in the Dog Breeder Society. (By the way, it really helps that the modular kennel doors I have have that gap under them where I can scrape this poop out). Once the poop is off the slab, I go along and rake it all up, I use a wheelbarrow to move it to the fire pit we have and I generally burn it. After scraping and removing as much poop as I can dry, then I bring the pressure washer in and use it to do a more thorough clean, this also gets the walls or sides of the kennel panels, as you know, dogs can be disgusting.
The problem is that I pressure wash the water over the edge of the kennel because I have no drainage trough, this means that the water seeps over the edge, right to the foundation, causing a bit more issues. I should’ve added a sidewalk to my kennels that extended about 4’, this way I would not be putting water along the edge of my slab, it would also prevent me from tracking dirt, potentially carrying disease into each lane as I clean. If I were smarter about it, I would have a trough for drainage. I’ve come up with a few plans in my head, but all of them have some form of drainage. It also takes me about 30 seconds to pressure wash my boots after stepping into the mud before walking into the kennel, this means that over the 10 active lanes I have, that’s an additional 5 minutes wasted of my time. It doesn’t seem like much, but it all adds up.
Another silly thing…I don’t have any doors on my building. This means there is a breezeway, which for 9 months out of the year, in Arizona, is amazing, but it’s not great in the winter. Having doors would’ve been nice to stop the breeze. Just removing the breeze can be very helpful in the winter. I usually end up rigging up a board to cover the doors in the winter, it works, but it’s not ideal. I would like some doggie door covers, too, I didn’t have a good solution for them, but I think I will be stealing Michelle’s door idea with Outwest Bassets. The part where she used angle iron, which is essentially a length of steel in an L-shape, and using two of them to sandwich in the vinyl strip that you can cut to be a doggie door.
In an effort to save money on concrete and block, and because I didn’t think it through well enough, I didn’t add enough room for storage. What has happened is that my original 12 lanes for dog runs turned into 10 lanes and the last two lanes of the slab I removed the kennel panels and it’s just an 8×12 area of concrete which is really helpful for storing things. We have a forklift on there, some other stuff, but I keep my pressure washer on it, and it’s a great little area to pressure wash other things, since they aren’t sitting on dirt.
I also don’t have anywhere to store dog food. I have a separate shed I use for this, it’s 12×24, it works, but it was in a fire, so the shed, while Bill repaired it for rain, I really need to get the interior set back up.
I don’t have electricity in my facility, nor heating or cooling. This isn’t the worst thing in the world because of my location in Arizona, but it would not be acceptable in other areas, like Montana or Michigan. In a future facility I’m exploring some radiant heating in the floors, ones that could be turned on or off depending on what was needed. They have similar concepts in a lot of custom homes in their bathrooms, which gave me the idea. Not having electric also means I use a lot of flashlights to check on things in the night, which isn’t the most ideal, wrangling dogs, a flashlight, and concrete aren’t always the best combination.
Exercise Pens
The exercise pens I have are attached to the back of the block wall, I just have two set up, and a third off the back of my house. I like their proximity to the kennels, but I also love how they use the block wall as a part of the pen wall, this allowed me to make bigger pens.
What I don’t like is that the pens I have are dirt floors, grass doesn’t last in small dog pens, and even if you had grass over a large area, dogs tend to make their dirt trails along their main paths. I would like to explore better flooring for the exercise pens in the future. I’ve looked into wood chips, but they harbor scorpions and sometimes snakes, plus they get soaked with water and flies and mosquitos love them. I looked into turf, but unless I’m able to cover it all, the turf will be too hot for my dogs in the summer. I looked at gravel, but I find that a bit too hard to scoop poop off of, especially if a dog has the runs. My favorite thing I’ve ever had, which would need to be refilled from time to time, is sand. The reason I had it was because when you make the mortar to build the block walls, they mix cement with sand. The sand was leftover and happened to be where I put the pen. The nice thing about the sand was that when it got wet it drained fast and didn’t stick to things. The dogs in the sand pen were cleaner and didn’t look like they were constantly dirty, unlike my dogs spending time in the other pen, with the red dirt. It also didn’t create mud pits and hard dips like dirt does, especially or Arizona dirt.
I’m surprised that my dogs have not really tried to dig out of the exercise pens all that much. In the past I’ve mixed up concrete in a wheelbarrow and put 12” x 12” pavers into the concrete and made a path around the base of the fence that they couldn’t dig. It’s surprising how dogs will dig at the base of fence, but that having the pavers there, they perceive them to be something they couldn’t dig under. However, if they were just pavers, they wouldn’t work either. They had to be in concrete, I’ve tried pavers without it and they will move the pavers.
You can also put fencing along the base of the fence if you have diggers. While chicken wire is appealing for its price and size, it can be really sharp and the dogs can bite it, rip it, and then cut themselves on it. It would be better to do that with livestock fencing, the ones with 2”x4” squares.
For shade, it’s ideal to have some form of structure in the pen, you just have to be careful that your dogs can’t use that as a way to escape the pen by jumping on it and then out, I’ve seen that a lot with my crazies. I have used old folding tables in a pinch to create shade that was easy to get inside an exercise pen.
I have also found that the dogs don’t like climbing chainlink as much as they will try and climb the welded wire. I’ve used the European Panels as they’re called for my exercise pen, it’s made of 1/2” vertical steel bars, the idea is that they can’t climb them. They’re 6’ tall and while some of my dogs have managed to jump to the top bar and then get themselves over, it has mitigated a lot of the issues I was having.
For water buckets, I bought the flat-sided buckets, and I hang them on the fences, my son walks down the line and waters all the dogs once a day. I would like to automate the water, but I’ve yet to find a way to do it that my dogs won’t tear up and create a giant flood. I’ll let you know if I figure all that out. The hanging of the buckets is important if you have studs that will pee in their buckets, dogs that will play in them and knock them over, and it does better to prevent rodents from getting in them, which oddly happens. I find mice in some of mine a lot.
I use heavier-duty carabiners or double-sided hooks to attach the water buckets.
You can mimic this same style for the food with buckets.
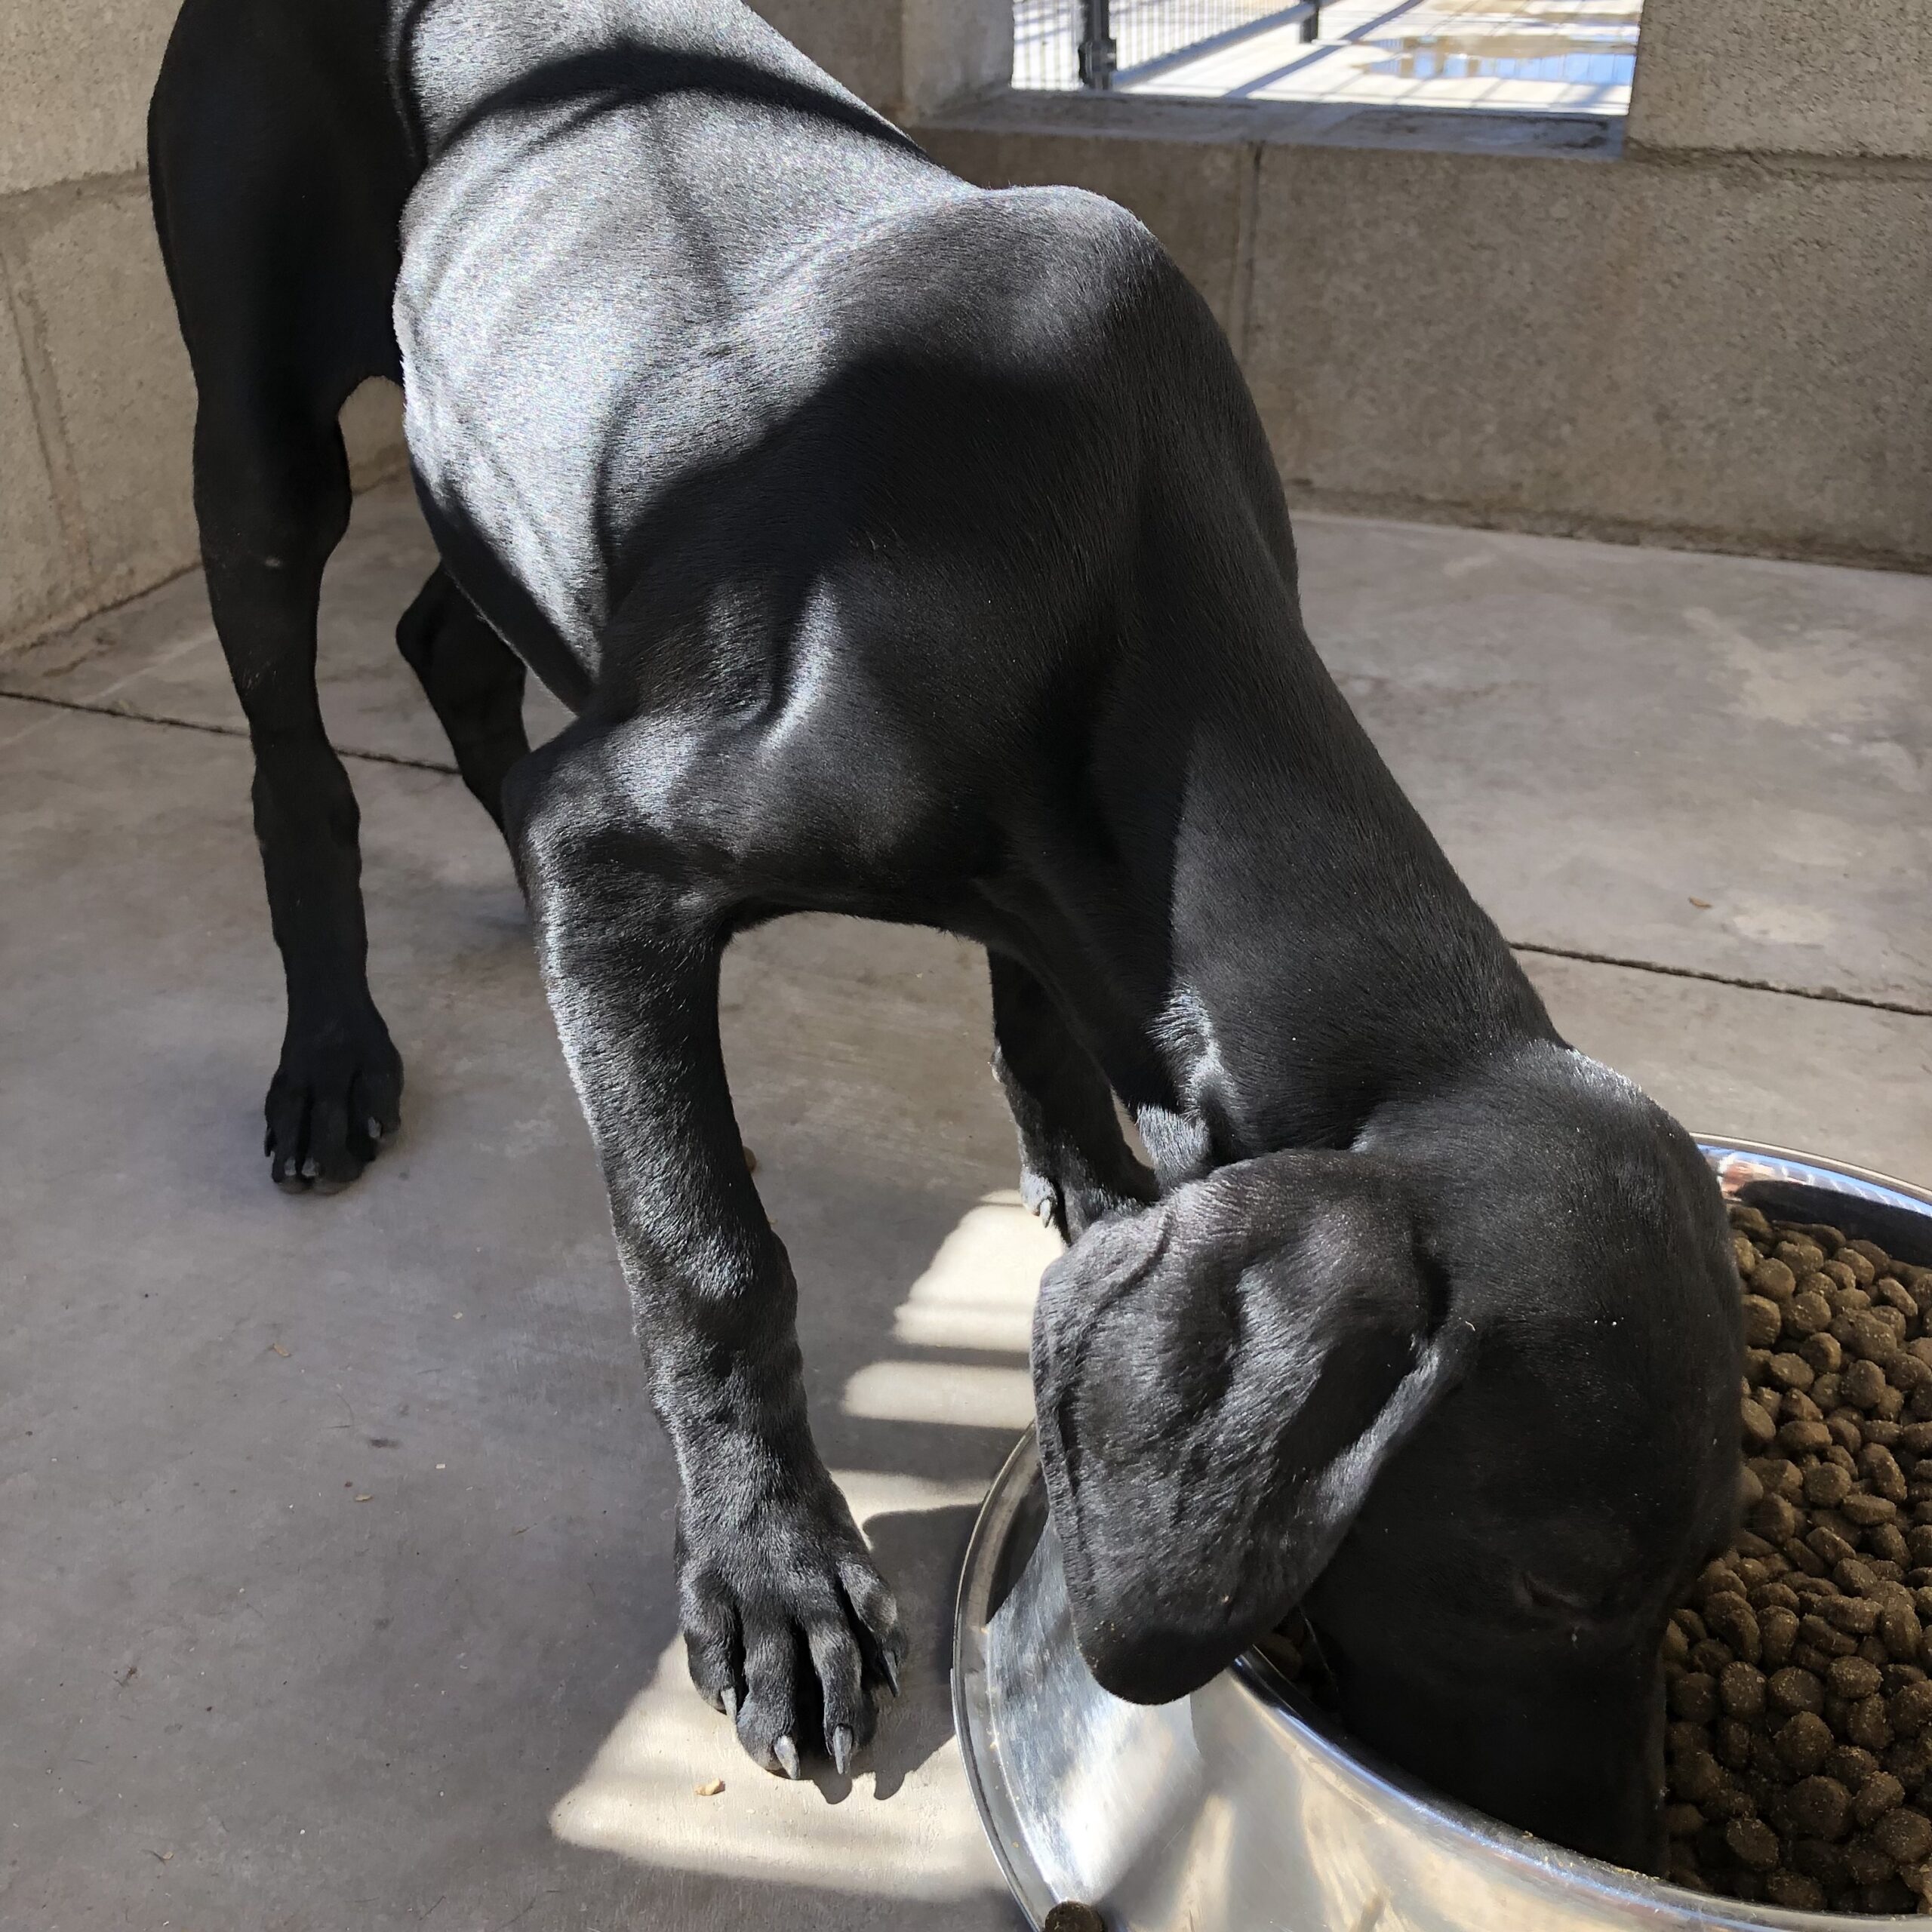
For my feed, I have two of the Brute Brand trash cans, the lids snap on nice and they last, but the best part about them is that they have dollies, the little wheels, that you can buy at Home Depot and screw into the bottom of the Brute Trash cans, they are Brute brand and work together. The big trash bin will fit (4) 30 lb bags in it, which lasts me a little over a week. In the second bin I have a different formula of food, it’s a little smaller and I can fit about 2.5 bags of rice feed in that. It lasts me a lot longer because I am only feeding my ratties with that feed. The beauty of the wheeling trash bins is that my daughter, who is 9 and does all the feeding, can wheel the trashcans up and down the aisle and scoop the feed, making the entire process pretty easy. It’s also easy for the guy I have feed my dogs when I leave. I just tell him how many scoops of what feed to feed each dog using a piece of blue painters tape on each kennel door, marked with a sharpie marker.
That’s a fairly decent review of my current exterior kennel. Some things work, some things could be better. It’s a great improvement, but I look forward to building my next one.
Photos of my exterior kennel
Additional photos & a MasterClass on designing your own kennel is inside the Dog Breeder Society.


Show Notes
Referenced Links
-
Want to learn more about facility design? Get the full MasterClass on Whelping & Puppy Rearing Facilities and Adult Kennels
